Portal
This page explains what can be configured in the Farinha Portal (home page) through the internal administration panel (Django Admin).
What can be configured in the Portal through Django Admin
- Highlights: cards displayed in the “Highlights” section of the home page.
- Map: display of the map on the home page and the source of the pins (Institutions or Sectors).
Note: the “Application Settings” section also gathers the bot protection options (Anubis), which are not part of the Portal. See: Security and HTTPS.
Who can do it
- SuperAdmin: accesses Django Admin and configures Highlights and the Map.
Configure Highlights (cards on the Home page)
“Highlights” are managed in two layers:
- Highlighted description (card content)
- Selected highlight (selection for the Home page and position)
Where it is in Django Admin:
- Webapp -> Highlighted descriptions
How to configure:
- Create/edit a “Highlighted description”.
- Select the “Description” (the holdings item that will be linked from the card).
- Fill in the card fields (for example: “Title” and “Descriptive text”).
- Add an “Image” (recommended).
- In the “Selected highlight” inline, add an item and define its “Position”.
Important rules:
- The Home page accepts at most 5 highlights.
- The “Position” is unique (it cannot be repeated) and defines the display order.
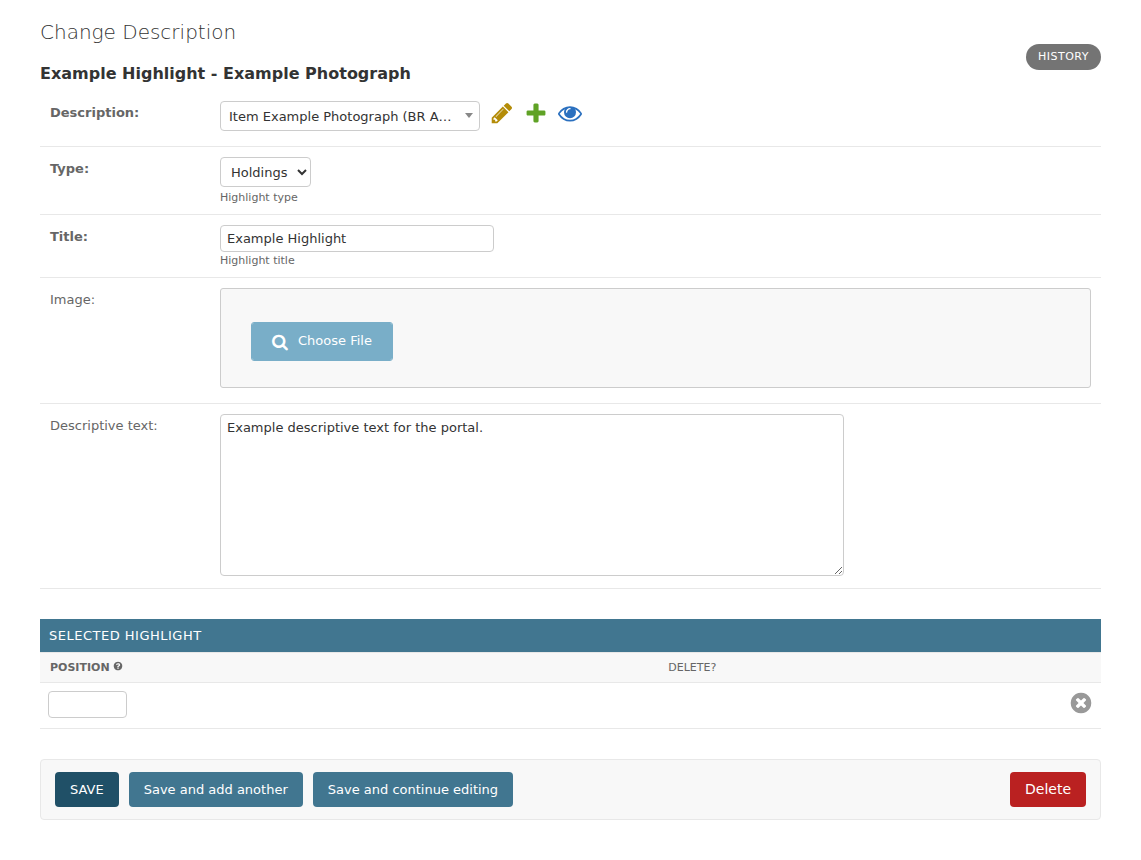
Portal highlights are configured in Django Admin and can be selected to appear on the Home page.
Configure the Portal Map
The map is controlled by application settings.
Where it is in Django Admin:
- Webapp -> Application Settings
Relevant settings:
- “Map Enabled?”: turns the map section on or off on the Home page.
- “Map Pins Source”: defines whether the pins come from “Institutions” or “Sectors”.
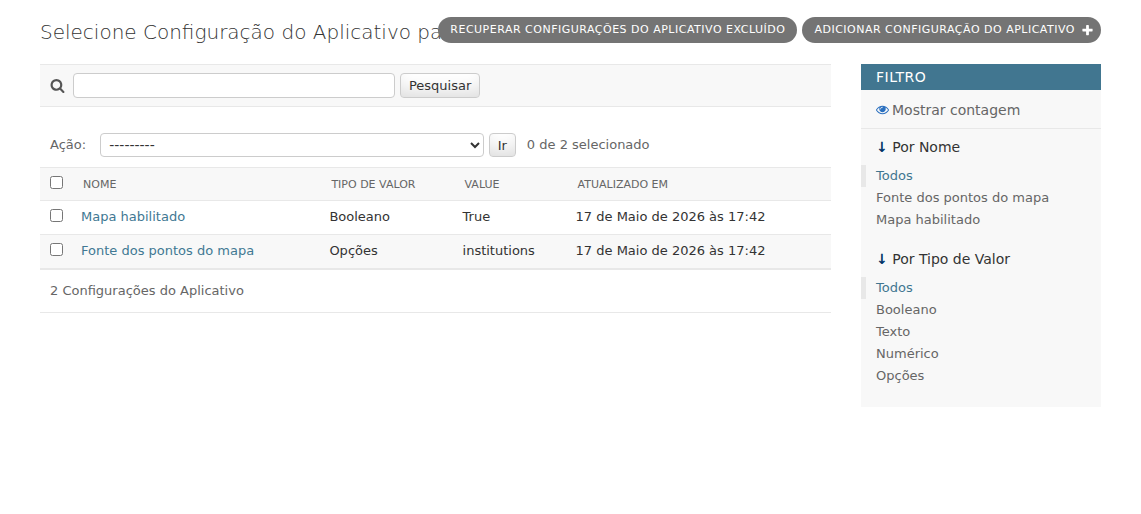
The Application Settings list gathers the map options and also the bot protection (Anubis) options.
Fill in latitude/longitude for the pins
For an item to appear as a pin on the map, it must have latitude and longitude filled in.
When the source is “Institutions”:
- Webapp -> Institutions -> open the Institution
- Under “Contact Area” -> “Location” section: fill in “Latitude” and “Longitude”
When the source is “Sectors”:
- Webapp -> Sectors / Subsectors / Sub-subsectors -> open the record
- Fill in the latitude/longitude fields of that record (when empty, the value may be reused from the level above)
Common problems
- The map does not appear: check whether “Map Enabled?” is enabled.
- No pin appears: latitude/longitude is missing (or only one of the two fields is filled in).
- A highlight does not appear: check whether there is a “Selected highlight” with a defined “Position” (and whether the limit of 5 has not been reached).
- Repeated “Position” raises an error: each selected highlight needs a unique position.
- The highlight appears without an image: the “Image” field is optional but recommended; without it, the card shows only text.
Good practices
- Fill in the “Descriptive text” thinking of those who read the card on the Home page: short sentences work better.
- Use good-resolution images in an appropriate format; overly large images make the Home page slower.
- Avoid leaving intermediate positions empty when rearranging highlights: adjust positions in sequence (1, 2, 3…).
- When changing the “Map Pins Source”, review the coordinates: records from the previous source may not appear in the new one.
- Always fill in latitude and longitude as a pair; only one of the two does not generate a pin.